Как вставить изображение в LaTeX документ?
иии. ничего не работает. Что делать? Как вставить изображение?
- Вопрос задан более трёх лет назад
- 14919 просмотров
Комментировать
Решения вопроса 0
Ответы на вопрос 1
Dum_spiro_spero @Dum_spiro_spero
Эта команда работает с форматом eps, а не jpg.
А вообще вам сюда:
habrahabr.ru/post/48122
и сюда:
dxdy.ru/topic3870.html
и важно чем вы компилируете — latexом или Pdflatexом.
Также Pdflatex не понимает картинки в формате eps.
Как сделать, чтобы pdflatex видел ваши eps-картинки? Подключите пакет cmap
\usepackage, после \usepackageвставьте \usepackage
Epstopdf входит в состав MikTeX, если он по какой-то причине не установлен – доустановите через Package Manager пакет Oberdiek. (A bundle of packages submitted by Heiko Oberdiek). Ваши eps-картинки будут переведены в pdf — появятся файлы с таким же названием – но с расширением pdf.
Ответ написан более трёх лет назад
Комментировать
Нравится 1 Комментировать
Ваш ответ на вопрос
Войдите, чтобы написать ответ

- C#
- +1 ещё
Между сборками и пространствами имён нет прямого соответствия. Что это значит?
- 1 подписчик
- 26 апр.
- 67 просмотров
Вставка изображений
Вставка изображений текст, как правило, доставляет некоторые трудности в связи с особенностями обработки оных в TeX’е.
Вставка изображений в варианте latex + dvips
При использовании связки latex + dvips (или latex + dvipdfm) картинки необходимо подготоваливать в .eps формате. Некоторые пакеты (например, R или Matlab) предоставляют возможность «родного» экспорта изображения в этот формат. В противном случае (например, для вставки скриншотов) можно использовать пакет Imagemagick.
Как только изображения подготовлены, то все просто. Подключаем в преамбуле пакет graphicx (больше никаких других пакетов не нужно!):
\usepackage
Если есть необходимость вставлять несколько изображений в одно, то еще subfigure:
\usepackage
. После этого в нужном месте достаточно вставить нечто типа:
\begin[h] \includegraphics[width=10cm] \caption \label \end
Расширение у файла указывать НЕ надо. Считается, что оно по-умолчанию .eps. В аргументах к команде \includegraphics можно указывать размер картинки и т.п. Более подробное описание пакета можно получить, скажем, здесь: PDF.
Вставка изображений в варианте pdflatex
pdflatex, в отличие от latex, не понимает формата eps. Все картинки надо готовить в форматах jpg, png или pdf (последний — предпочтительней). Произвести конверсию .eps ⇒ .pdf можно при помощи пакета Ghostscript (утилиты командной строки eps2pdf или меню «Export» в GhostView) или же уже известного пакета Imagemagick.
Все остальные инструкции по вставке изображений остаются в силе.
LaTeX для новичков. Часть 5:Вставка картинок
Автор таки вышел из пост-дипломного запоя и отпуска. На очереди экзамены в магистратуру и ещё два года ада.
На этот раз рассмотрим вставку картинок и других вкусностей в документы LaTeX.
Работа с картинками в LaTeX значительно отличается от привычных массам офисных пакетов тем что:
1) Картинки нельзя впихнуть в текстовый файл, картинки кладутся отдельными файлами и при передаче проекта требуется передать картинки тоже
2) Картинки встраивается при каждой пересборке проекта, что облегчает их обновление. Требуется лишь заменить картинку на новую с тем же именем. При работе с графиками из CAS возможно получить автоматическую синхронизацию графиков с проектом (настроить автосохранение графиков в файл).
3) Поддержка форматов — LaTeX поддерживает как растровые, так и векторные форматы, что позволяет экономить время на конвертации. Предпочтительный растровый формат для графиков/чертежей/прочих картинок с линиями и текстом — png. Для svg требуются дополнительные манипуляции — пересохранение в inkscape для LaTeX. В этом случае будет синхронизирован шрифт текста на картинке с текстом документа.
4) Позиционирование картинок LaTeX делает сам. Пользователь может высказывать пожелания где их расположить. Есть режимы для форсирования положения, но они не рекомендуются к использованию.
5) Размер картинок — подбирается либо опытным путём, либо по аналогичной картинке. Есть работа с относительными единицами \textwidth, \linewidth и т.д. После привыкания становится крайне удобно — вставка картинки сводится к копипасту кода прошлой картинки, правки названия и подписи.
6) Обтекание текстом — по умолчанию отсутствует. Почему? Потому что смотрится плохо. Для тех кому оно всё таки нужно, есть пакет wrapfig.
Для поддержки вставки картинок в современных форматах требуется добавить в преамбулу следующие пакеты:
\usepackage%Вставка картинок правильная
\usepackage%Обтекание фигур (таблиц, картинок и прочего)
Для вставки картинки используем следующий код:
Как видно из данного кода, производится вставка иллюстрации (figure), с выравниванием по центру (\centering), файла 1oummm.jpg (лежащего в одной папке с проектом), подписью «диагрмма моментов. «, меткой fig:mpr, шириной 0.8 от ширины линии (соотношение сторон остаётся постоянным, если не указаны явно ширина и высота). Стоит также обратить внимание, что картинка вставлена не на месте кода, а ниже на строку. Это определяется параметром положения иллюстрации ([h]). Данный параметр может принимать следующие формы — h here, t top, b bottom, p page, H HERE (делает картинку плавающей с помощью пакета float). Также есть возможность форсировать положение добавив восклицательный знак — h! вставит картинку прямо на место кода, но это не является рекомендуемым вариантом вставки — достойный вид документа не гарантируется.
Картинки при вставке возможно вращать командой опцией angle (угол, против часовой стрелки в градуса), origin задают точку относительно которой вращается картинка (с соответствует центру)
Больше примеров возможно найти по следующей ссылке и в документации пакета graphics.
На очереди таблицы!
6 лет назад
Давно перешел на работу в LaTeX, подпишусь, может что нового узнаю. А так, за пост +.
P. S. С таблицами парился, пока не нашел онлайн сервис, который огромные таблицы нормально оформляет)
раскрыть ветку
5 лет назад
@madarexxx очень нужна ваша помощь по latex, можно к вам обратиться?
раскрыть ветку
6 лет назад
@pyshchpyshch ,@stopkin ,@4M0D4 ,@Hesed ,@bulkaschaem ,@Aleshonne , @Shahirrim ,@saimhe ,@saimhe ,@AleksandrRoni ,@AlexCalvados ,@Antilles,@sirca
ВНЕЗАПНО! небольшое продолжение руководства по латеху для новичков
раскрыть ветку
Похожие посты
7 лет назад
LaTeX для новичков. Часть 1:Редакторы и дистрибутивы
В комментариях к введению, был поставлен вопрос о редакторах. Выбор редакторов для LaTeX огромен — любое приложение умеющее открывать и сохранять txt файлы пригодно для создания проектов. В данном обзоре рассмотрим только основные редакторы. Поскольку автор использует Debian Linux в качестве рабочей системы, рассматриваться будут кроссплатформенные редакторы. В природе встречаются редакторы с поддержкой только Windows, но никакими реальными/ощутимыми преимуществами они не обладают.

TeXstudio и TeXworks. Первый — форк второго, поэтому рассматриваем вместе. Типовые редакторы, в активном состоянии разработки. Техстудио, используемый автором, регулярно обновляется и получает новые возможности.
+Однооконный режим работы
+Показ документа (для наглядности)
+Графические инструменты для вставки картинок и таблиц
+Автодополнение (правда не слишком удачное)
+Боковая панель с быстрым доступом к части математических символов
+Портативная сборка, работает с портативной установкой
-Qt5 — при использовании в Debian Stable, требуется использовать AppImage пакет для корректной работы переключения раскладок

Kile. Редактор LaTeX проекта KDE, основная среда обитания — Linux. Порт под Windows отстал на несколько лет. Кодировку не поднял. В родной среде работает как часы.
+Предшествовал появлению TeXworks, поэтому плюсы совпадают
-Порт под Windows устарел
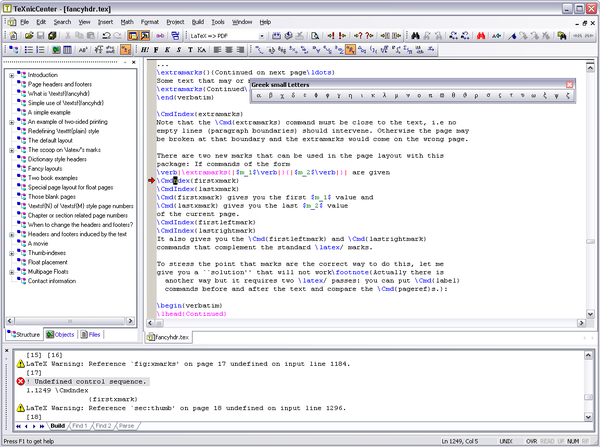
TeXnicCenter. Только под MS Windows.
+Показ строк с ошибками
+Меню с функциями LaTeX
-Работает с Adobe Acrobat
-Нет однооконного режима
-Разработка прекращена 3 года назад
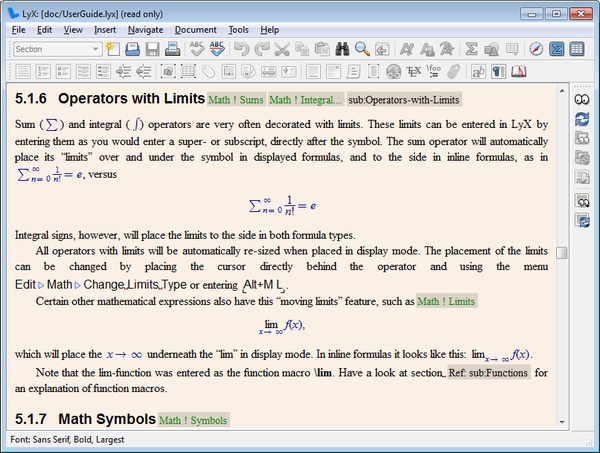
LyX. Кросплатформенный. Работает не напрямую с LaTeX, а с собственным форматом .lyx (с последующим экспортом в .tex).
+Показывает формулы готовыми
-Осложнена работа напрямую с LaTeX
-Нет поддержки всех стилей
-Требует переучиваться с других редакторов
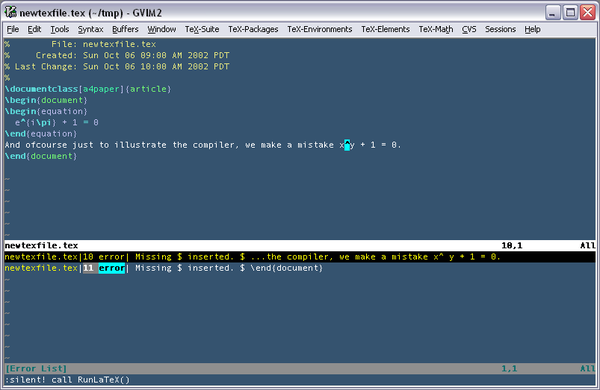
VIMLaTeX. Редактор для настоящих ценителей. Кроссплатформенный.
+Полностью текстовый интерфейс. Идеально подходит для работы по удалёнке (например через SSH).
+Минимальные системные требования (нет графики, нет проблем)
+Утончённый набор горячих клавиш.
-Нет встроенного показа готового документа
-Порог вхождения — требуется понимать не только что писать, но еще и как писать
-Нет графических инструментов для ввода таблиц
AuCTeX = Emacs+LaTeX. Ещё сложнее в освоении чем VIM, умеет копировать горячие клавиши оного, помимо своего набора. Работает как в графическом, так и в текстовом режимах.
+Инструменты для ввода таблиц
+Показ таблиц, формул и картинок прямо в тексте
+Скриптуется. От и до. Язык — собственный диалект Lisp
-Нетороплив в работе — поскольку является скриптом

Дистрибутивы. LaTeX является свободным ПО, поэтому каждый волен распространять его по своему. На данный момент существует два с половиной основных дистрибутива:
1) TeXLive — основной дистрибутив, поддерживает Win/Mac/Lin, при установке позволяет установить копию всего CTAN, что вызывает проблему большого веса в установленном виде (3-4 Гб).
2) MiKTex — дистрибутив доступный только под MS Windows, предлагает динамическую загрузку недостающих пакетов при сборке. Малый вес в установленном виде, требует интернет для дозагрузки пакетов. Пользователи иногда жалуются что дозагрузка весьма медленная (типовая установка 500-800 мБ).
2.5) CTAN — Comprehensive TeX Archive Network. Основа для двух дистрибутивов выше, хранилище пакетов TeX.
Автор использует TeXLive, поскольку имеет вечные проблемы с интернетом в общежитии и использует Linux.
p.s. С первым подписчиком меня 🙂
Показать полностью 7
7 лет назад
LaTeX для новичков. Введение.
Гуманитариям тоже будет полезно. Им стоит заглянуть в самый конец поста.
Данная серия постов предназначена для абитуриентов и студентов — тем кому нужно писать большое количество текста за минимальное время.
Для начала, небольшое и упрощенное пояснение — [LaTeX]( https://ru.wikipedia.org/wiki/LaTeX ) (читается как «лАтэх»), это старейшая система для оформления научных работ, набор макросов работающий поверх [TeX]( https://ru.wikipedia.org/wiki/LaTeX ) (читается как «тЕх»).
У читателей никогда не сталкивавшихся с этими системами должен возникнуть закономерный вопрос — «а что в них такого?». Рассмотрим преимущества и недостатки LaTeX подробней:
-Готовый результат можно увидеть только после сборки.
-Набранный текст в LaTeX есть полноценный программный код. Во время обучения будет очень тяжело найти ошибку.
-Количество людей которые умеют использовать LaTeX в СНГ невелико. Концентрация может меняться от 0 (в школах и гуманитарных факультетах) до обязательного использования всеми студентами (продвинутые кафедры физических и математических факультетов).
-Наличие большого количества не очевидных случаев, которые решаются с помощью гугла и напильника.
-Требуется потратить от недели до нескольких месяцев на обучение.
Казалось бы, любая система которая имеет подобные недостатки обречена. Ведь Ворд худо-бедно знают все, он худо-бедно работает и т.д. Но преимущества использования LaTeX настолько велики, что он на протяжении 30 лет остаётся актуальным инструментом для оформления работ во многих областях.
+Модульность. LaTeX состоит из модулей, называемых пакетами. Пакеты написаны на том же языке, что и сам LaTeX, поэтому могут менять все его компоненты и логику их работы.
+Возможности. Нельзя сказать что кто-то знает все возможности LaTeX, за 30 лет для него написано множество пакетов, которые охватывают всё что может только придти в голову при написании работ. Для примера можно привести наличие встроенной системы рисования и черчения, не просто не уступающих аналогам в MS Office, но и на порядки их превосходящих. (Ниже приведен для примера малый фрагмент схемы из курсовой работы автора. Следует обратить внимание на формулы и общую дзен-простоту оформления по ГОСТ)

+Системные требования. LaTeX работает на всём что шевелится. При сборке потребление может достигать 200 Мб оперативной памяти. Также продвинутый редактор может потреблять 300 мегабайт памяти при нескольких открытых проектах.
+Кроссплатформенность и облачность. LaTeX работает на всех актуальных и не очень операционных системах, начиная с Win 95/98. Также, поскольку LaTeX предполагает раздельное написание и сборку проектов, он идеально подходит для облачных технологий. Вы можете редактировать проекты даже с калькуляторов (лишь бы они могли открывать текстовые файлы). Для всех актуальных мобильных платформ есть клиенты для облачных сервисов.
+Всё есть текст. Вся работа с LaTeX может производиться не отрывая рук от клавиатуры. Вспомните, сколько раз Вы ошибались в значении в формулах и были вынуждены пролистывать весь документ MS Word в поисках тех формул где встречается это значение и исправлять его руками. В LaTeX требутся лишь сделать массовую замену значения. И всё. Во всём документе исправлено.
+Формулы это тоже текст. Не требуется калечить себе голову пытаясь накликать пятиэтажную формулу в MS Office, который еще и не факт что умеет подобное. Сложность формул в LaTeX НЕ ограничена. Экспорт формул в TeX’овскую нотацию умеет каждая уважающая себя система компьютерной алгебры. Нотация простая и легко запоминается при наличии минимальных знаний английского.
+Стабильность. Сколько раз у Вас падал Ворд погребя за собой часы работы? Битые файлы Ворда уже давно не новость. Поскольку LaTeX имеет в основе простой текст, исходники проекта не могут неисправимо побиться.
+Совместимость. Обратная — вы можете взять проект написанный 20 лет назад, и он соберется. Причём несмотря на ошибки в логе выглядеть будет так же как 20 лет назад.
+На выходе PDF. Правильный PDF, со встроенными файлами картинок, векторным текстом. Распечатается везде и всюду, как надо. Можно забыть об «ой, у нас ворд 2010 а у вас 2007, у вас все номера сползли».
+Разметка. При оформлении в LaTeX вы указываете структуру документа. Это позволяет абстрагироваться от внешнего вида документа и сосредоточиться на его содержании.
+Гибкость и автоматизация. В LaTeX есть стили, наборы настроек и подключенных пакетов которые оформят ваш набранный текст по требуемому ГОСТ, шаблону оформления статьи в журнале и т.д.
+Нумерация и система ссылок. Нумерация всех объектов пересчитывается при каждой пересборке, что позволяет поддержать их точность. Ссылки на объекты производятся по их индивидуальным меткам. Это весьма удобно, поскольку сослаться на объект «eq:to_dlinnoye_urye» гораздо проще чем на «3.13»
+Библиография. Со стилями. С поддержкой ГОСТ. Автоматически и по фен-шую.
+Редакторы. Поскольку LaTeX это простой текст, пользователь может найти редактор себе по вкусу и системным требованиям. Автор использует TeXstudio.
+Лицензия (в СНГ не слишком актуально, конечно). LaTeX является свободным ПО, соответственно бесплатен к использованию в любых целях и количествах.
+Совместная работа. Существует несколько облачных сервисов которые предлагают совместную работу без каких либо ограничений. Также, возможна совместная работа в offline, с использованием систем контроля версий (например git).
ВЫВОД: LaTeX позволяет сэкономить время на оформлении работ, писать конспекты по математическим и гуманитарным дисциплинам на лету, получать идеально оформленные документы пригодные для печати и публикаций. А еще бесплатен.
p.s. Осилившие сей длиннопост, отпишитесь пожалуйста, стоит ли пилить продолжение?
p.p.s Буду признателен за подсказанные ошибки в тексте.
Inserting Images
Three ways to insert images (create LaTeX figures) in Overleaf
The options are as follows:
- Use the Insert Figure button( ), located on the editor toolbar, to insert a figure into Visual Editor or Code Editor.
- Copy and paste an image into Visual Editor or Code Editor.
- Use Code Editor to write LaTeX code that inserts a graphic and places it inside a figure environment.
Options 1 and 2 automatically generate the LaTeX code required to create your figure, but here we explore option 3, which provides the most flexibility.
Introduction
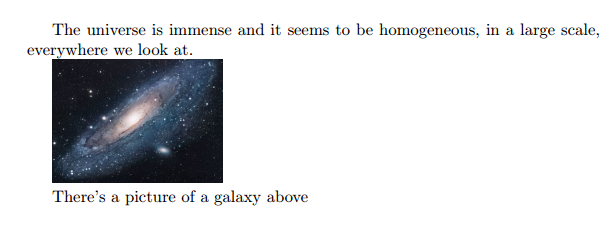
In this article we explain how to include images in the most common formats, how to shrink, enlarge and rotate them, and how to reference them within your document. We will start with an example to demonstrate how to import a picture.
\documentclassarticle> \usepackagegraphicx> \graphicspath ./images/> > \begindocument> The universe is immense and it seems to be homogeneous, in a large scale, everywhere we look at. \includegraphicsuniverse> There's a picture of a galaxy above \enddocument>
Latex can not manage images by itself, so we need to use the graphicx package. To use it, we include the following line in the preamble: \usepackage .
The command \graphicspath < <./images/>> tells L a T e X that the images are kept in a folder named images under the directory of the main document.
The \includegraphics command is the one that actually included the image in the document. Here universe is the name of the file containing the image without the extension, then universe.PNG becomes universe . The file name of the image should not contain white spaces nor multiple dots.
Note: The file extension is allowed to be included, but it’s a good idea to omit it. If the file extension is omitted it will prompt LaTeX to search for all the supported formats. For more details see the section about generating high resolution and low resolution images.
The folder path to images
When working on a document which includes several images it’s possible to keep those images in one or more separated folders so that your project is more organised.
The command \graphicspath < > tells L a T e X to look in the images folder. The path is relative to the current working directory—so, the compiler will look for the file in the same folder as the code where the image is included. The path to the folder is relative by default, if there is no initial directory specified, for instance
%Path relative to the .tex file containing the \includegraphics command \graphicspath images/> >
This is a typically straightforward way to reach the graphics folder within a file tree, but can leads to complications when .tex files within folders are included in the main .tex file. Then, the compiler may end up looking for the images folder in the wrong place. Thus, it is best practice to specify the graphics path to be relative to the main .tex file, denoting the main .tex file directory as ./ , for instance:
%Path relative to the main .tex file \graphicspath ./images/> >
as in the introduction.
The path can also be absolute, if the exact location of the file on your system is specified. For example, if you were working on a local LaTeX installation on your own computer:
%Path in Windows format: \graphicspath c:/user/images/> > %Path in Unix-like (Linux, Mac OS) format \graphicspath /home/user/images/> >
Notice that this command requires a trailing slash / and that the path is in between double braces.
You can also set multiple paths if the images are saved in more than one folder. For instance, if there are two folders named images1 and images2 , use the command
\graphicspath ./images1/>./images2/> >
Changing the image size and rotating the picture
If we want to further specify how L a T e X should include our image in the document (length, height, etc), we can pass those settings in the following format:
\begindocument> Overleaf is a great professional tool to edit online documents, share and backup your \LaTeX<> projects. Also offers a rather large help documentation. \includegraphics[scale=1.5]overleaf-logo>
The command \includegraphics[scale=1.5] will include the image overleaf-logo in the document, the extra parameter scale=1.5 will do exactly that, scale the image 1.5 of its real size.
You can also scale the image to a some specific width and height.
\begindocument> Overleaf is a great professional tool to edit online documents, share and backup your \LaTeX<> projects. Also offers a rather large help documentation. \includegraphics[width=5cm, height=4cm]overleaf-logo>
As you probably have guessed, the parameters inside the brackets [width=3cm, height=4cm] define the width and the height of the picture. You can use different units for these parameters. If only the width parameter is passed, the height will be scaled to keep the aspect ratio.
The length units can also be relative to some elements in document. If you want, for instance, make a picture the same width as the text:
\begindocument> The universe is immense and it seems to be homogeneous, in a large scale, everywhere we look at. \includegraphics[width=\textwidth]universe>
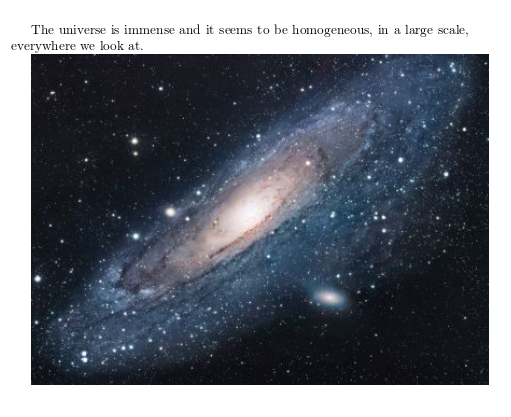
Instead of \textwidth you can use any other default L a T e X length: \columnsep , \linewidth , \textheight , \paperheight , etc. See the reference guide for a further description of these units.
There is another common option when including a picture within your document, to rotate it. This can easily accomplished in L a T e X :
\begindocument> Overleaf is a great professional tool to edit online, share and backup your \LaTeX<> projects. Also offers a rather large base of help documentation. \includegraphics[scale=1.2, angle=45]overleaf-logo>

The parameter angle=45 rotates the picture 45 degrees counter-clockwise. To rotate the picture clockwise use a negative number.
Positioning
In the previous section was explained how to include images in your document, but the combination of text and images may not look as we expected. To change this we need to introduce a new environment.
In the next example the figure will be positioned right below this sentence. \beginfigure>[h] \includegraphics[width=8cm]Plot> \endfigure>
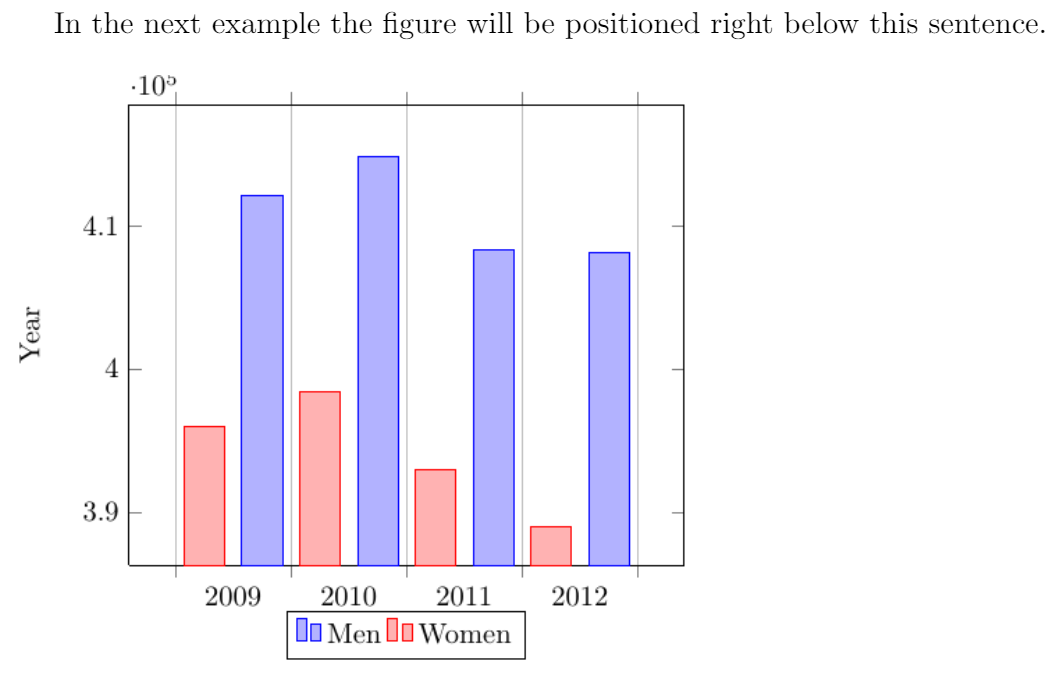
The figure environment is used to display pictures as floating elements within the document. This means you include the picture inside the figure environment and you don’t have to worry about it’s placement, L a T e X will position it in a such way that it fits the flow of the document.
Anyway, sometimes we need to have more control on the way the figures are displayed. An additional parameter can be passed to determine the figure positioning. In the example, begin[h] , the parameter inside the brackets set the position of the figure to here. Below a table to list the possible positioning values.
| Parameter | Position |
|---|---|
| h | Place the float here, i.e., approximately at the same point it occurs in the source text (however, not exactly at the spot) |
| t | Position at the top of the page. |
| b | Position at the bottom of the page. |
| p | Put on a special page for floats only. |
| ! | Override internal parameters LaTeX uses for determining «good» float positions. |
| H | Places the float at precisely the location in the L a T e X code. Requires the float package, though may cause problems occasionally. This is somewhat equivalent to h!. |
In the next example you can see a picture at the t op of the document, despite being declared below the text.
In this picture you can see a bar graph that shows the results of a survey which involved some important data studied as time passed. \beginfigure>[t] \includegraphics[width=8cm]Plot> \centering \endfigure>
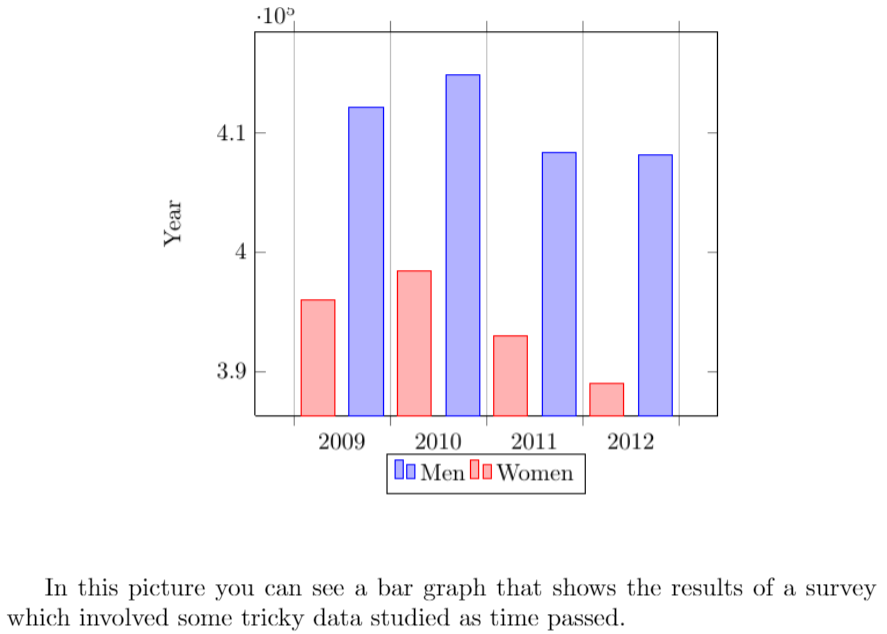
The additional command \centering will centre the picture. The default alignment is left.
Wrapping text around figures
It’s also possible to wrap the text around a figure. When the document contains small pictures this makes it look better.
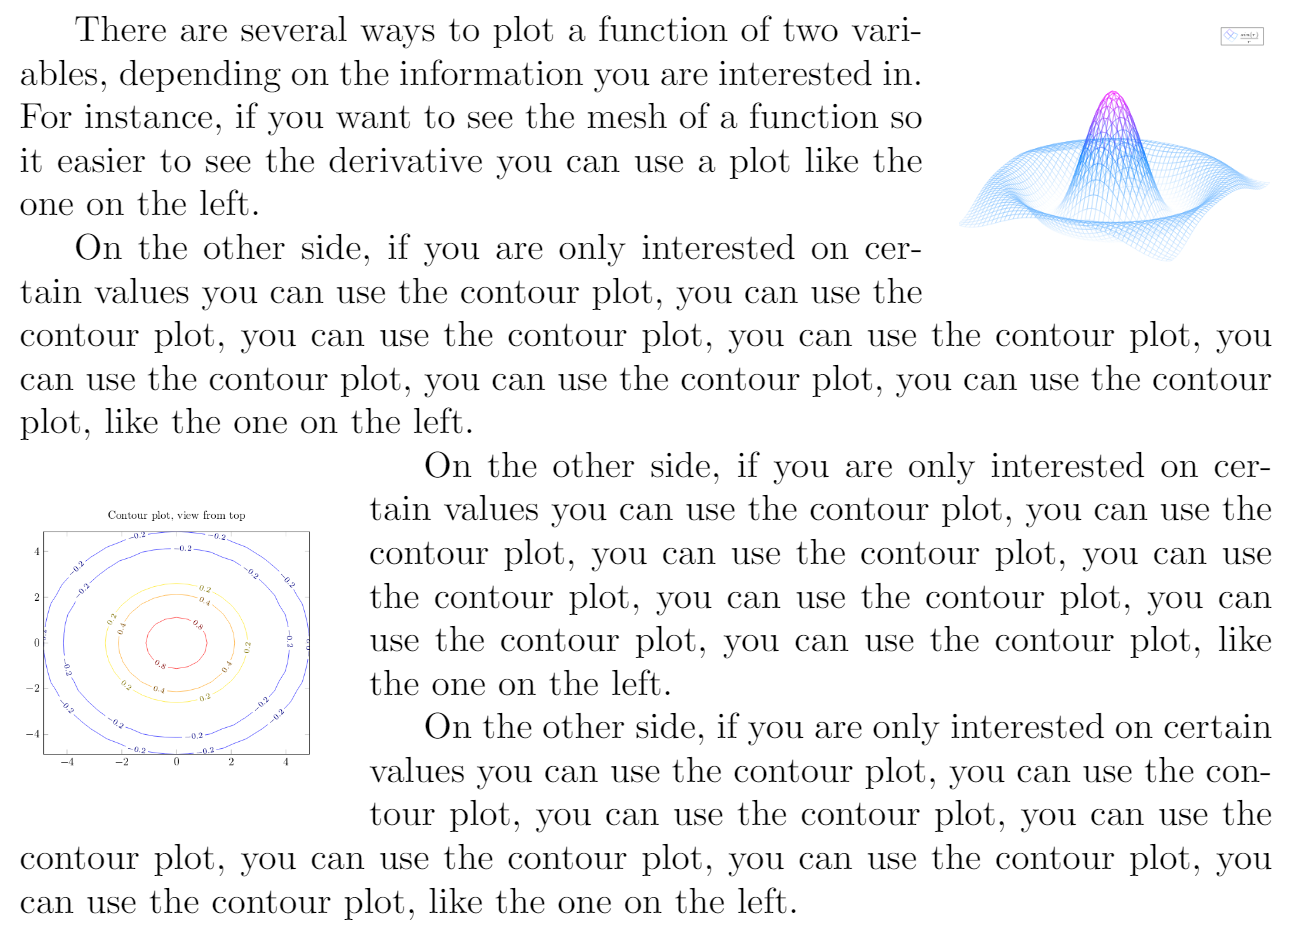
\beginwrapfigure>r>0.25\textwidth> %this figure will be at the right \centering \includegraphics[width=0.25\textwidth]mesh> \endwrapfigure> There are several ways to plot a function of two variables, depending on the information you are interested in. For instance, if you want to see the mesh of a function so it easier to see the derivative you can use a plot like the one on the left. \beginwrapfigure>l>0.25\textwidth> \centering \includegraphics[width=0.25\textwidth]contour> \endwrapfigure> On the other side, if you are only interested on certain values you can use the contour plot, you can use the contour plot, you can use the contour plot, you can use the contour plot, you can use the contour plot, you can use the contour plot, you can use the contour plot, like the one on the left. On the other side, if you are only interested on certain values you can use the contour plot, you can use the contour plot, you can use the contour plot, you can use the contour plot, you can use the contour plot, you can use the contour plot, you can use the contour plot, like the one on the left.
For the commands in the example to work, you have to import the wrapfig package. To use wrapfig , include the following line in the document preamble:
\usepackagewrapfig>
This makes the wrapfigure environment available and we can place an \includegraphics command inside it to create a figure around which text will be wrapped. Here is how we can specify a wrapfigure environment:
\beginwrapfigure>[lineheight]position>width> . \endwrapfigure>
The position parameter has eight possible values:
| r | R | right side of the text |
| l | L | left side of the text |
| i | I | inside edge–near the binding (in a twoside document) |
| o | O | outside edge–far from the binding |
The uppercase version allows the figure to float. The lowercase version means exactly here.
Now you can define the wrapfigure environment by means of the commands \begin \end . Notice that the environment has two additional parameters enclosed in braces. Below the code is explained with more detail:
This defines the alignment of the figure. Set l for left and r for right. Furthermore, if you are using a book or any similar format, use instead o for the outer edge and i for the inner edge of the page. This is the width of figure box. It’s not the width of the image itself, that must be set in the \includegraphics command. Notice that the length is relative to the text width, but normal units can also be used (cm, in, mm, etc). See the reference guide for a list of units. \centering This was already explained, but in this example the image will be centred by using its container as reference, instead of the whole text.
For a more complete article about image positioning see Positioning images and tables
Captioning, labelling and referencing
Captioning images to add a brief description and labelling them for further reference are two important tools when working on a lengthy text.
Captions
Let’s start with a caption example:
\beginfigure>[h] \captionExample of a parametric plot ($\sin (x), \cos(x), x$)> \centering \includegraphics[width=0.5\textwidth]spiral> \endfigure>
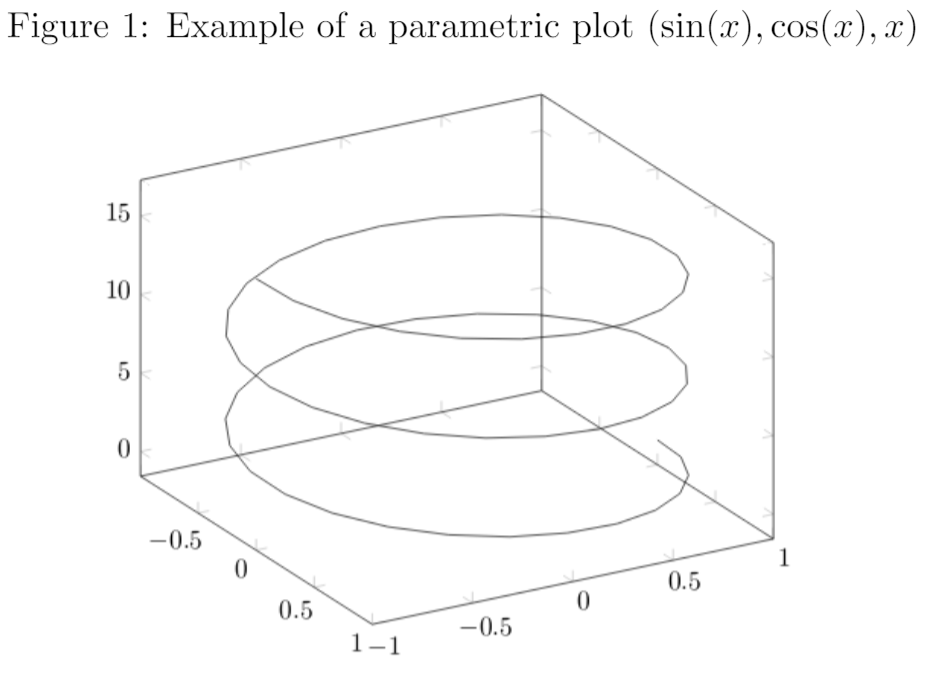
It’s really easy, just add the \caption and inside the braces write the text to be shown. The placement of the caption depends on where you place the command; if it’s above the \includegraphics then the caption will be on top of it, if it’s below then the caption will also be set below the figure.
Captions can also be placed right after the figures. The sidecap package uses similar code to the one in the previous example to accomplish this.
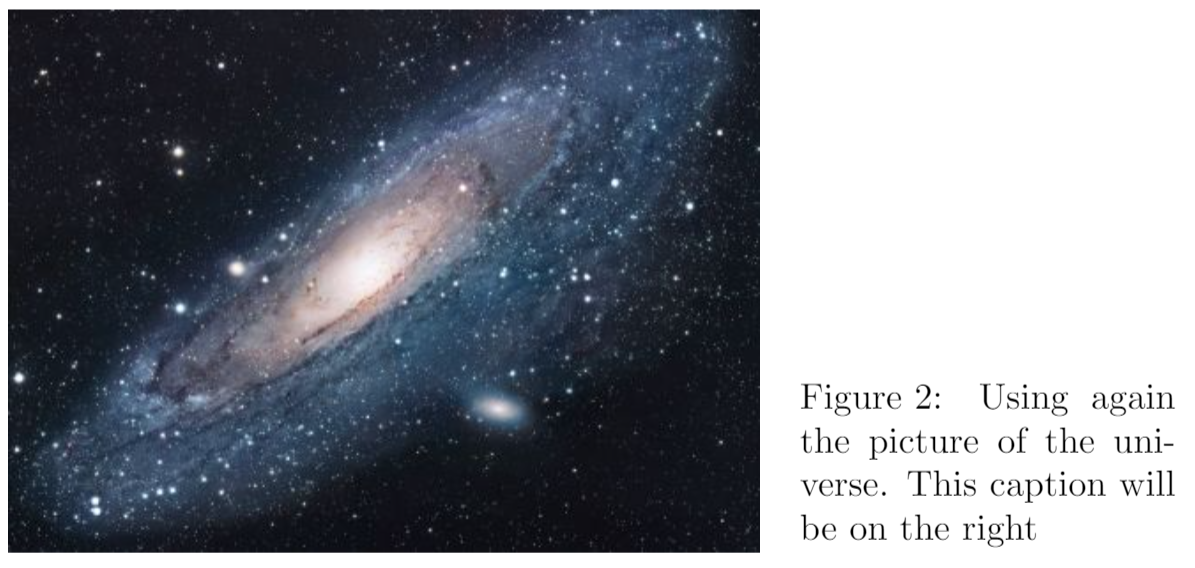
\documentclassarticle> \usepackage[rightcaption]sidecap> \usepackagegraphicx> %package to manage images \graphicspath images/> > \beginSCfigure>[0.5][h] \captionUsing again the picture of the universe. This caption will be on the right> \includegraphics[width=0.6\textwidth]universe> \endSCfigure>
There are two new commands
\usepackage[rightcaption] As you may expect this line will import a package named sidecap , but there is an additional parameter: rightcaption . This parameter establishes the placement of the caption at the right of the picture, you can also use leftcaption . In book-like documents outercaption and innercaption are also available. The names of these are self-descriptive. \begin[0.5][h] \end Defines an environment similar to figure . The first parameter is the width of the caption relative to the size of the image, as declared in \includegraphics . The second parameter h works exactly as in the figure environment. See the placement section for more information.
You can do a more advanced management of the caption formatting. Check the further reading section for references.
Labels and cross-references
Figures, just as many other elements in a L a T e X document (equations, tables, plots, etc) can be referenced within the text. This is very easy, just add a \label to the figure or SCfigure environment, then later use that label to refer the picture.
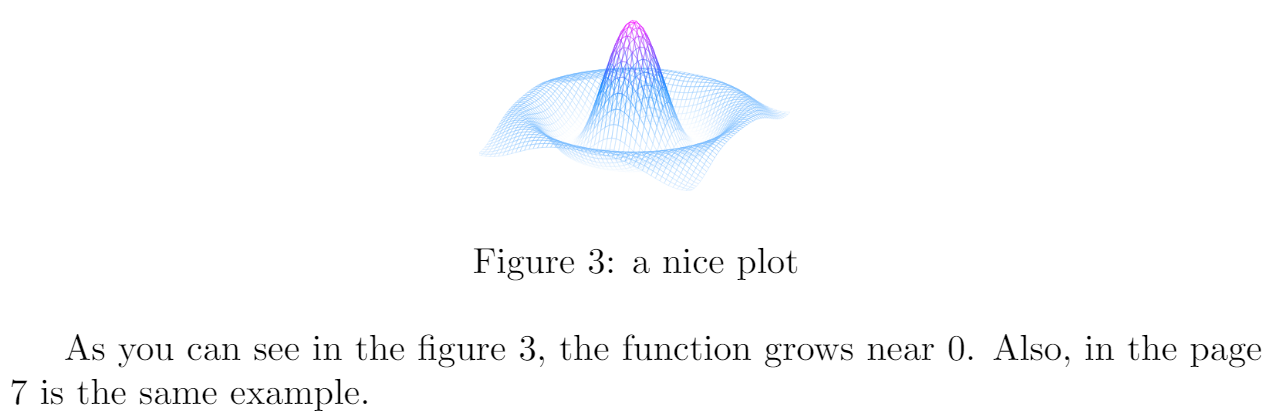
\beginfigure>[h] \centering \includegraphics[width=0.25\textwidth]mesh> \captiona nice plot> \labelfig:mesh1> \endfigure> As you can see in the figure \reffig:mesh1>, the function grows near 0. Also, in the page \pagereffig:mesh1> is the same example.
There are three commands that generate cross-references in this example.
\label This will set a label for this figure. Since labels can be used in several types of elements within the document, it’s a good practice to use a prefix, such as fig: in the example. \ref This command will insert the number assigned to the figure. It’s automatically generated and will be updated if insert some other figure before the referenced one. \pageref This prints out the page number where the referenced image appears.
The \caption is mandatory to reference a figure.
Another great characteristic in a L a T e X document is the ability to automatically generate a list of figures. This is straightforward.
\listoffigures
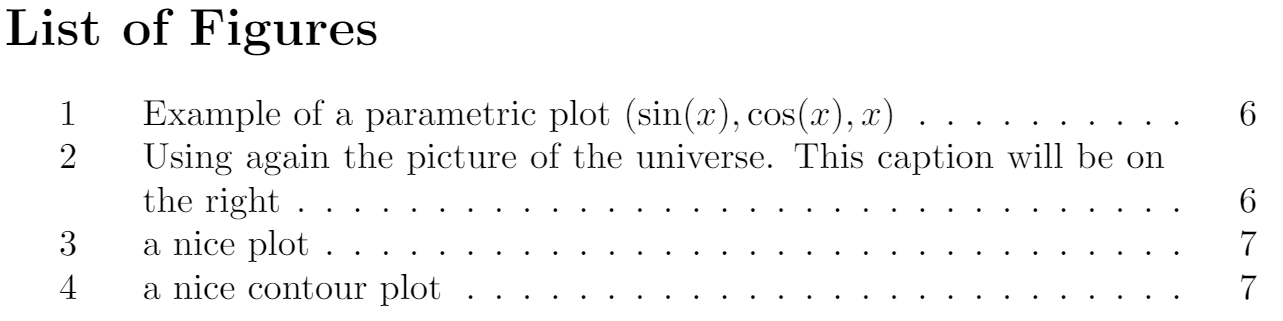
This command only works on captioned figures, since it uses the caption in the table. The example above lists the images in this article.
Important Note: When using cross-references your L a T e X project must be compiled twice, otherwise the references, the page references and the table of figures won’t work—Overleaf takes care of that for you.
Generating high-res and low-res images
So far while specifying the image file name in the \includegraphics command we have omitted file extensions. However, that is not necessary, though it is often useful. If the file extension is omitted, LaTeX will search for any supported image format in that directory, and will search for various extensions in the default order (which can be modified).
This is useful in switching between development and production environments. In a development environment (when the article/report/book is still in progress), it is desirable to use low-resolution versions of images (typically in .png format) for fast compilation of the preview. In the production environment (when the final version of the article/report/book is produced), it is desirable to include the high-resolution version of the images.
This is accomplished by
- Not specifying the file extension in the \includegraphics command, and
- Specifying the desired extension in the preamble.
Thus, if we have two versions of an image, venndiagram.pdf (high-resolution) and venndiagram.png (low-resolution), then we can include the following line in the preamble to use the .png version while developing the report —
\DeclareGraphicsExtensions.png,.pdf>
The command above will ensure that if two files are encountered with the same base name but different extensions (for example venndiagram.pdf and venndiagram.png), then the .png version will be used first, and in its absence the .pdf version will be used, this is also a good ideas if some low-resolution versions are not available.
Once the report has been developed, to use the high-resolution .pdf version, we can change the line in the preamble specifying the extension search order to
\DeclareGraphicsExtensions.pdf,.png>
Improving on the technique described in the previous paragraphs, we can also instruct L a T e X to generate low-resolution .png versions of images on the fly while compiling the document if there is a PDF that has not been converted to PNG yet. To achieve that, we can include the following in the preamble after \usepackage
\usepackageepstopdf> \epstopdfDeclareGraphicsRule.pdf>png>.png>convert #1 \OutputFile> \DeclareGraphicsExtensions.png,.pdf>
If venndiagram2.pdf exists but not venndiagram2.png, the file venndiagram2-pdf-converted-to.png will be created and loaded in its place. The command convert #1 is responsible for the conversion and additional parameters may be passed between convert and #1. For example — convert -density 100 #1.
There are some important things to have in mind though:
- For the automatic conversion to work, we need to call pdflatex with the —shell-escape option.
- For the final production version, we must comment out the \epstopdfDeclareGraphicsRule , so that only high-resolution PDF files are loaded. We’ll also need to change the order of precedence.
Reference guide
L a T e X units and legths
| Abbreviation | Definition |
|---|---|
| pt | A point, is the default length unit. About 0.3515mm |
| mm | a millimetre |
| cm | a centimetre |
| in | an inch |
| ex | the height of an x in the current font |
| em | the width of an m in the current font |
| \columnsep | distance between columns |
| \columnwidth | width of the column |
| \linewidth | width of the line in the current environment |
| \paperwidth | width of the page |
| \paperheight | height of the page |
| \textwidth | width of the text |
| \textheight | height of the text |
| \unitlength | units of length in the picture environment. |
About image types in L a T e X
latex When compiling with latex, we can only use EPS images, which is a vector format. pdflatex If we are compiling using «pdflatex» to produce a PDF, then we can use a number of image formats —
JPG: Best choice if we want to insert photos PNG: Best choice if we want to insert diagrams (if a vector version could not be generated) and screenshots PDF: Even though we are used to seeing PDF documents, a PDF can also store images EPS: EPS images can be included using the epstopdf package (we just need to install the package, we don't need to use \usepackage<> to include it in our document.)
Vector format or bitmap format? Images can be of either vector format of bitmap format. Generally we don’t need to worry about it, but if we do happen to know the format the image is in, we can use that information to choose an appropriate image format to include in our LaTeX document. If we have an image in vector format, we should go for PDF or EPS. If we have it in bitmap format, we should go for JPG or PNG, as storing bitmap pictures in PDF or EPS takes a lot of disk space.
Further reading
For more information see
- Positioning images and tables
- Lists of tables and figures
- Single sided and double sided documents
- Lengths in LaTeX
- floatrow package for advanced caption managing of floating elements (tables and figures)
- sidecap package documentation, for side-figure captions
- epstopdf package documentation (EPS to PDF conversion)